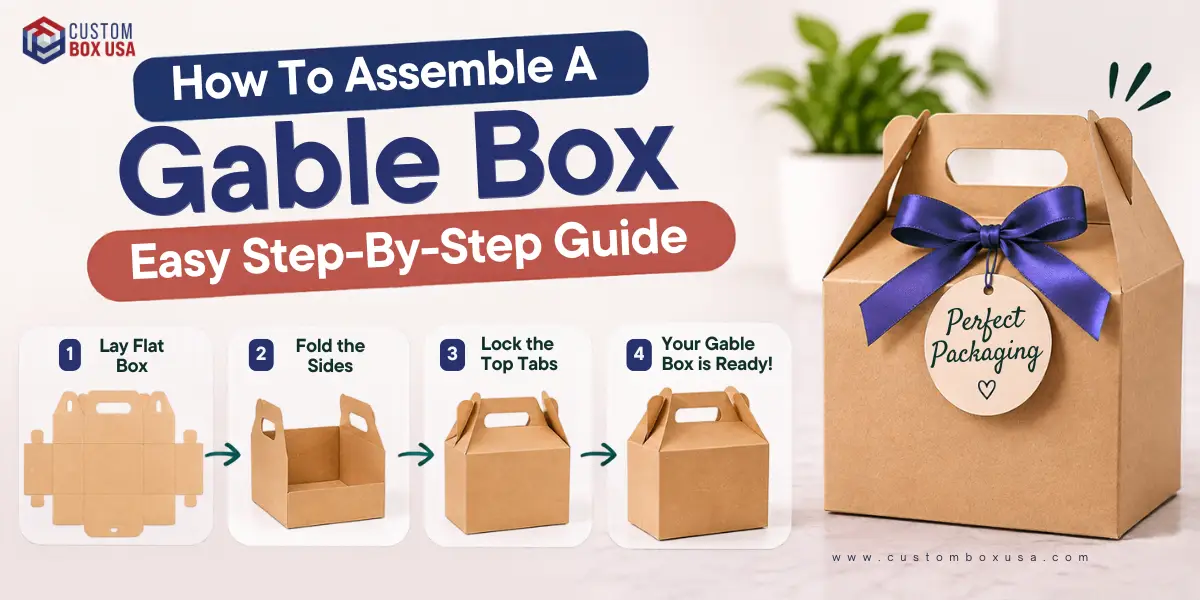
If you're wondering how to assemble a gable box, the method is short: open the flat box, lock the bottom first, then fold the two roof panels up and join them at the handle. That's the whole method, and it works for most flat-packed gable boxes. The order matters more than speed. A box folded out of sequence can pop open and drop cookies or party favors on the floor.
The good news is that every mistake on this page is easy to avoid once you know what to look for. Start with the quick answer below, then follow the steps.
| Quick answer | Details |
|---|---|
| What you need | The flat box and a clean, flat table. For a DIY box: cardstock, a ruler, a scoring tool, scissors and glue or double-sided tape. |
| Time | A few minutes for your first box. It gets much faster after that. |
| Skill level | Easy. If you can fold paper along a line, you can do this. |
| Result | A firm box with a roof-shaped top and a handle, ready to fill and carry. |
What is a gable box and what do you need to assemble it?
A gable box is a box with a roof-shaped top and a built-in handle, a bit like a little house you can carry. If yours came flat-packed, you don't need any tools at all.
Parts of a gable box
Every gable box has four main parts. Once you know their names, the steps are easy to follow.
- Body: the four side walls that hold your items.
- Gable panels: the two slanted panels at the top that fold up to make the "roof."
- Handle: the top strip where the gable panels meet, usually with a cut-out hole for your fingers.
- Bottom: the flaps that close the base and carry the weight.
You'll also see score lines. A score line (also called a crease) is a pressed line in the board that shows you where to fold. Follow these lines and the box almost builds itself.
Tools: flat-packed vs. DIY
"Flat-packed" means the box was shipped folded flat to save space, and you open it yourself. These boxes are already cut and scored, and the side seam is often glued. Your hands and a table are enough.
A DIY box starts from a template (also called a dieline), which is a flat drawing of the box with its cut and fold lines. For that, you'll want a ruler, scissors, glue or an adhesive strip, and a scoring tool. A bone folder is a common choice. It presses a fold line into the paper, so the paper folds cleanly instead of cracking.
Which bottom does your gable box have?
Most gable boxes use one of four bottom types: interlocking tabs, tuck-in, auto-lock or glued. Before you fold anything, lay the flat box on a clean surface and look closely at the bottom flaps.
This small check saves a lot of frustration. Each bottom folds in a different order, and if you start with the wrong flap, the base won't sit flat.
Quick table: the four bottom types
| Bottom type | What you'll see | Folding order |
|---|---|---|
| Interlocking tabs | Four separate flaps. Some have small tabs, and some have slots. | Fold the smaller flaps in first. Lay the larger flaps over them. Slide the tabs into the slots. |
| Tuck-in | One long flap with a rounded edge, plus two small side flaps. | Fold the side flaps in. Then fold the long flap over and tuck its edge into the opening or under the opposite flap. |
| Auto-lock (crash-lock) | The bottom flaps already look joined and folded inside the flat box. | Open the box into a tube and press down on the bottom. It snaps into place on its own. |
| Glued (DIY) | Plain flaps with no tabs or slots, usually on a homemade box. | Fold the flaps in and stick them with glue or double-sided tape. |
How to tell at a glance
Start by looking for slots. Small slots with matching tabs mean an interlocking bottom. If the flaps already seem stuck together inside the flat box, it's almost always an auto-lock. One long flap with a rounded tongue means tuck-in, and if you see none of these, you'll need glue.
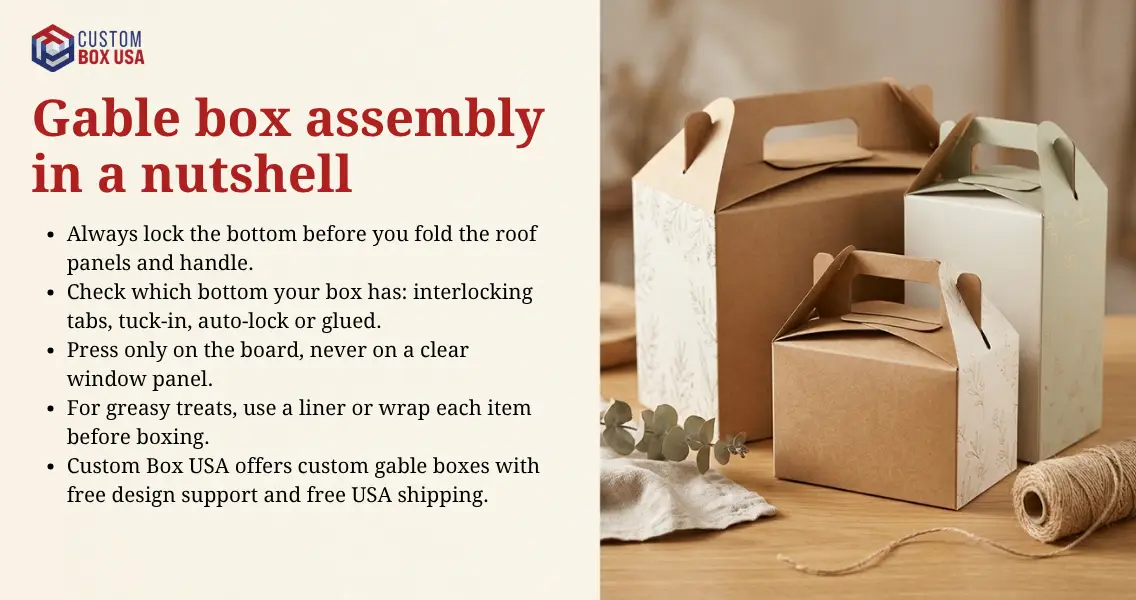
Gable box assembly in a nutshell
How to assemble a gable box: step by step
Open the box, crease the folds, lock the bottom, fill it, then close the roof and handle. Follow this order every time and the box will hold.
Step 1: Open the flat box and crease each fold
Place the flat box on a clean, dry table. Gently push the two side edges toward each other so the box opens into a square tube.
Now run your finger or a ruler edge along each score line. This pre-creases the folds, so the walls stand straight and the corners look sharp. Fold each line in the direction it already wants to bend, because folding against the crease can crack the print.
Step 2: Lock the bottom
Turn the open tube upside down and close the base using the method from the table above.
- Interlocking tabs: small flaps in, large flaps over, tabs into slots. Then press the center of the base flat with your palm.
- Tuck-in: side flaps in first, then tuck the long flap firmly into place.
- Auto-lock: push down inside the box until the bottom clicks flat.
Flip the box upright and press on the base from the inside. It should feel flat and firm. If it sags or a flap slips out, open it and redo it now. That takes seconds on an empty box and is far harder once the box is full.
Step 3: Fill the box, then fold the gable panels
Put your items in now, while the top is still wide open. The roof makes the opening much smaller, so large items are hard to add later. Then fold the two short end flaps (the small triangle-shaped flaps) inward.
Next, bring the two large gable panels up so they meet in the middle like a roof. The handle strips should sit flat against each other, with the handle holes lined up. If your box has an adhesive strip on the handle, peel off the backing and press the two sides together. If it has a locking tab, slide it through its slot.
Step 4: Check the finished box
Take a few seconds to look it over before you hand it to anyone:
- The bottom is locked and flat.
- The side walls stand straight, with no bent creases.
- Both handle holes line up so your fingers go through cleanly.
- Nothing is pushing against the window, if your box has one.
- The roof closes without forcing, with space left under it.
If your box passes all five, it's ready to carry.
How it works: why the folds hold
A well-folded gable box stays shut because of pressure and order, not glue. The bottom flaps overlap and press against each other, and the weight inside pushes them tighter.
That's why the bottom always comes first. Once the roof is closed, you can't reach the base to set it flat. The roof also does a second job. When the two gable panels meet, they pull the tops of the side walls inward, which makes the whole box stiffer. The handle then spreads the weight across both panels instead of just one.
One limit to keep in mind: steps can vary a little by design. Some boxes add an extra tab or an insert. If yours came with an instruction sheet, follow it, or ask the maker's team.
How do you fold a DIY gable box from a template?
You score the lines, cut the flaps, fold along the scores, then glue the side seam and bottom. It takes longer than opening a flat-packed box, but it's a nice craft project when you only need a few.
Score, cut, fold, glue
This gable box tutorial from Split Coast Stampers makes a box from a single 8.5 x 11 in (21.6 x 27.9 cm) sheet of cardstock, with scores at set points on both sides. Cardstock is thick paper that works well for light boxes. The method follows this order:
- Score the fold lines with a ruler and scoring tool.
- Cut along the short lines to free the top and bottom flaps.
- Fold every score line firmly.
- Glue the side seam to form a tube.
- Punch the handle hole through both top panels at once so they line up.
- Glue the bottom flaps closed and decorate.
Choose a sturdy paper. Thin paper is easy to fold, but it bends under weight, so save it for light treats.
Store it flat by leaving the base unglued
If you leave the base unglued, you can store your DIY box flat until you need it. Mixed Up Craft points this out, and it's handy when you're making boxes weeks before an event. Glue the bottom on the day you fill the box.
Common mistakes and fixes
Most gable box problems come from folding in the wrong order or packing too much inside. Here's what each one looks like and how to put it right.
| Problem | Likely cause | Fix |
|---|---|---|
| Bottom pops open | Flaps locked in the wrong order, or the box is too heavy | Redo the bottom in the right order. Lighten the load or use a sturdier box. |
| Crooked folds | Folding next to the score line, not on it | Hold a ruler edge on the line and fold against it. |
| Cracked creases | Folding against the crease, or refolding it many times | Fold each line once, in its natural direction. |
| Torn handle | Too much weight, or lifting by one panel | Line up both handle holes and lift with both panels together. Keep loads light. |
| Bent or creased window | Pressing on the clear window panel | Hold the box by its edges and press only on the board. |
| Roof won't close | Box is overfilled | Leave space under the roof, or move up a size. |
| Grease spots on the box | Oily food touching the board | Add a liner or wrap each treat first. |
Pro tips for faster, cleaner assembly
Build one sample first, then set up an assembly line. These habits save time and keep you from wasting boxes.
- Assemble one test box. Fill it with your real items and carry it around for a while. You'll catch problems before you fold fifty.
- Work in stages. Open every box, then lock every bottom, then fill them all, then close every roof. Doing one task at a time is faster than finishing boxes one by one.
- Use a flat, clean surface. A wobbly table leads to crooked folds.
- Build in small batches. For events, fold only what you can fill that day.
- Store boxes flat in a dry spot. Damp air can soften paperboard, so open only what you need.
Gable boxes for party favors
A gable box for party favors is a simple, low-risk choice. Guests can carry it by the handle, and the house shape already looks like a small gift before you add a ribbon.
Sizes and fill ideas
Measure your largest item first, then pick a size with a little room under the roof. Common uses include wedding favors, birthday candy, baby shower treats, school holiday treats and bake-sale cookies. Small trinkets, wrapped candies, mini soaps and seed packets all fit well.
If you'd like a box made for this purpose, take a look at our custom favor boxes too.
Assembling in batches for events
Party boxes usually hold the same fill, so the assembly line tip works especially well. Lock all the bottoms the night before and store the open boxes in a large bin. On the day, fill them, close the roofs and line them up on a table for guests.
Gable boxes for food and bakery treats
A gable box for food works well for cookies, cupcakes, muffins and pastries, as long as the material suits your product. For greasy or sticky items, put a liner between the food and the board.
Liners and wrapping for greasy items
A liner is a sheet or tray that keeps oil and crumbs off the box board. Butter cookies, donuts and glazed treats can leave spots on plain paperboard. For example, you could line the base with a grease-resistant insert, or wrap each donut in wax paper before it goes in. Handle the boxes with clean hands, and keep them dry before you fold them.
Planning a cookie line? Our custom cookie boxes page shows more shapes that may suit your bake.
What "food-contact" means
A food-contact surface is any part of the box that touches food. In the US, the FDA (the agency that oversees materials that touch food) sets its rules in a set of regulations called 21 CFR. According to the FDA guidance on food contact material components, parts used in line with a regulation in 21 CFR 174 to 179 need no further FDA review. Part 176 covers paper and paperboard, and Part 175 covers adhesives and coatings.
For a simple walk-through of what to check, read our food-safe packaging checklist for bakeries and cafes.
Ask our team which materials suit your product
Every food is different. A dry shortbread needs less protection than a frosted cupcake. Tell us what you're packing, and our team will help you choose a material, coating or liner that fits it.
Custom gable boxes from Custom Box USA
Custom gable boxes let you pick the size, board, window and print, so the box fits your product and shows your brand. Every time someone carries one out the door, it works as a silent salesman for you.
Your size, your material, your print
With our custom gable boxes, you choose:
- Size: built around your treats or favors, so nothing slides around.
- Material: kraft (a strong brown paper with a natural look that's recyclable), white paperboard or other recyclable stock.
- Window: with or without a clear panel to show what's inside.
- Printing and finish: your logo printed inside, outside or both, with gloss or matte, spot UV, foil, embossing or debossing.
Help from start to finish
Our free graphic design support means you can upload finished artwork or simply share your logo. We offer free shipping across the USA and charge no die or plate fees. The minimum order is as low as 1 unit. That's the safest way to start: order a sample, test the folds with your own products, then place your bulk order with confidence.
Timing for holiday orders
Standard turnaround is 8 to 10 business days, and rush orders take 4 to 6 days. Timing may vary with order volume and location. With holiday pickups and corporate gift season coming up fast, it's smart to request your quote early. You can also browse our holiday gift boxes for seasonal ideas.
Frequently Asked Questions
How do you assemble a gable box?
Open the flat box, lock the bottom, fill it, then fold the two gable panels up and join them at the handle. Crease each score line first, and check that the base is flat before you fill it.
How do you make gable boxes from scratch?
Score a template on cardstock, cut the flaps, fold along the scores, then glue the side seam and bottom. Punch the handle hole through both top panels at once so the holes line up.
How do you assemble flat-pack cardboard boxes?
Open the box into a tube, close the bottom flaps in the right order, then close the top. For gable boxes, the "top" is the roof and handle, and the bottom always comes first.
Do gable boxes need glue or tape?
Most flat-packed gable boxes don't need glue or tape, because the bottom locks with tabs or an auto-lock. DIY boxes and plain-flap designs do need glue or double-sided tape.
Can you fold a gable box flat again?
Yes, most interlocking and tuck-in boxes can be unlocked and folded flat again. Each extra fold weakens the crease a little, so refold them gently and not too often.
Can you put food in a gable box?
Yes, as long as the material suits your food. Use a liner or wrap greasy items, and ask our team which materials fit your product.
Can I print my logo on gable boxes?
Yes, Custom Box USA prints logos on gable boxes, inside, outside or both. Our free design support can help you set up the artwork.
Ready for gable boxes that fit your treats?
Folding a gable box is simple once you lock the bottom first and treat the window gently. If you'd like boxes sized and printed for your brand, we're happy to help you turn every pickup into a branded moment.
Get a free quote and tell us your size, material and design. We reply to quote requests within 2 hours and can guide you from a single sample to a full order.